


Victory gardens took root in American history in WWI when many farmers were needed by our military. Farm food supply dwindled and what remained was stretched thin— shipped overseas to our troops and to feed mouths at home. Our government launched an effort to encourage families to plant “Victory Gardens” as a patriotic duty. By the end of WWII, over 40% of our country’s produce consumption relied on these individual family gardens.

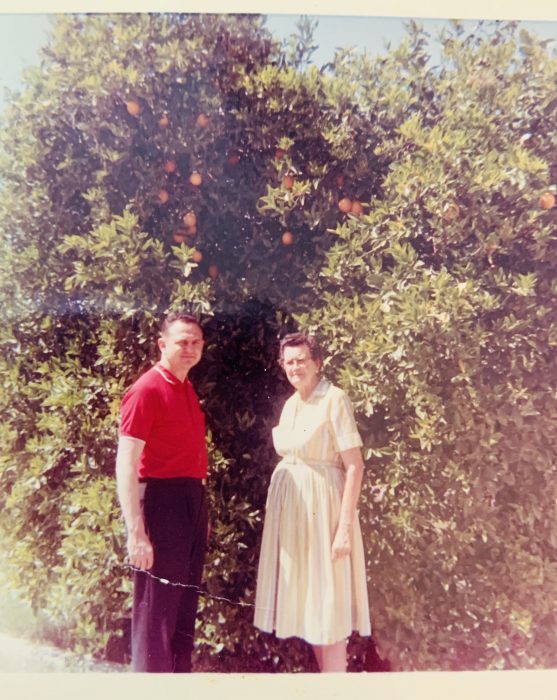
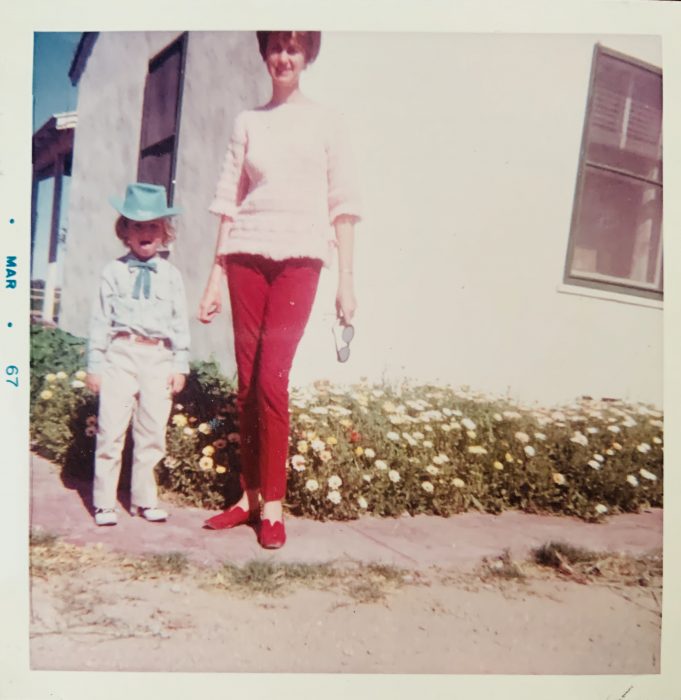
During that era, my maternal grandparents planted citrus trees and vegetables. My mom remembers helping can black-eyed peas, okra, tomatoes and jars of fruit preserves. When my father (an Air Force pilot) was in Vietnam, we went to live in my mom’s hometown of Yuma, Arizona. I remember climbing the old, rickety, wooden ladder to fill a bucket of oranges, tangerines, grapefruit and tangelos. I’d help my Grammy juice oranges to freeze in metal ice trays, which I’d eat out of a paper cup like a popsicle. I never caught a single cold that year, protected by fresh, yummy vitamin C from those decades-old citrus trees.


Today, as we fight the war on COVID-19, each trip to the grocery store puts us on the line of fire of this invisible enemy. Planting some of our own fresh produce at home, can reduce the number of trips to the grocery store for perishables. Getting kids involved growing their own vegetables and fruit can make eating healthier a lot more fun too. Plus a few minutes in the sun gardening a day can offer a dose of Vitamin D your body needs to shield itself from COVID-19 according to two studies.
Now is a great time to get started, with parents working from home and kids wrapping up online learning. Science, Home Economics, and Cooking become backyard learning that can continue to blossom over the summer with your Corona Victory Garden. If you’re convinced you have a brown thumb, or the notion of taking on a garden now just seems too daunting, these tips will make it easier.
1. Start small until your comfort-level grows. Maybe begin with a simple pot of herbs. Austin weather is warm enough to grow herbs year-round with little effort. Even if you live in an apartment, you could put a pot in the window sill, front door step or balcony.
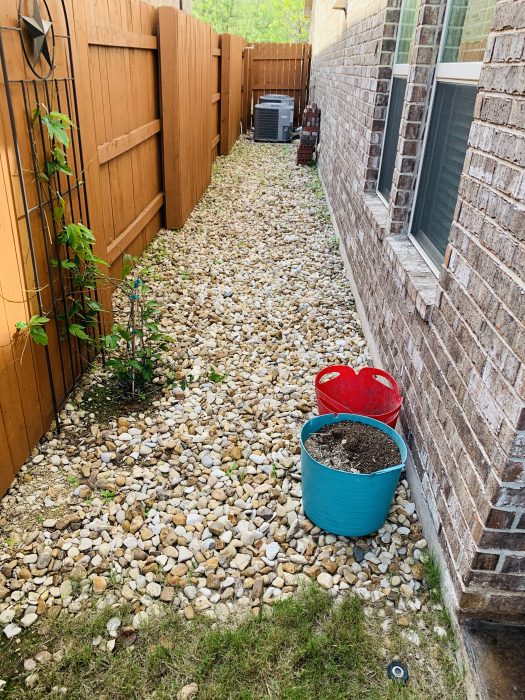
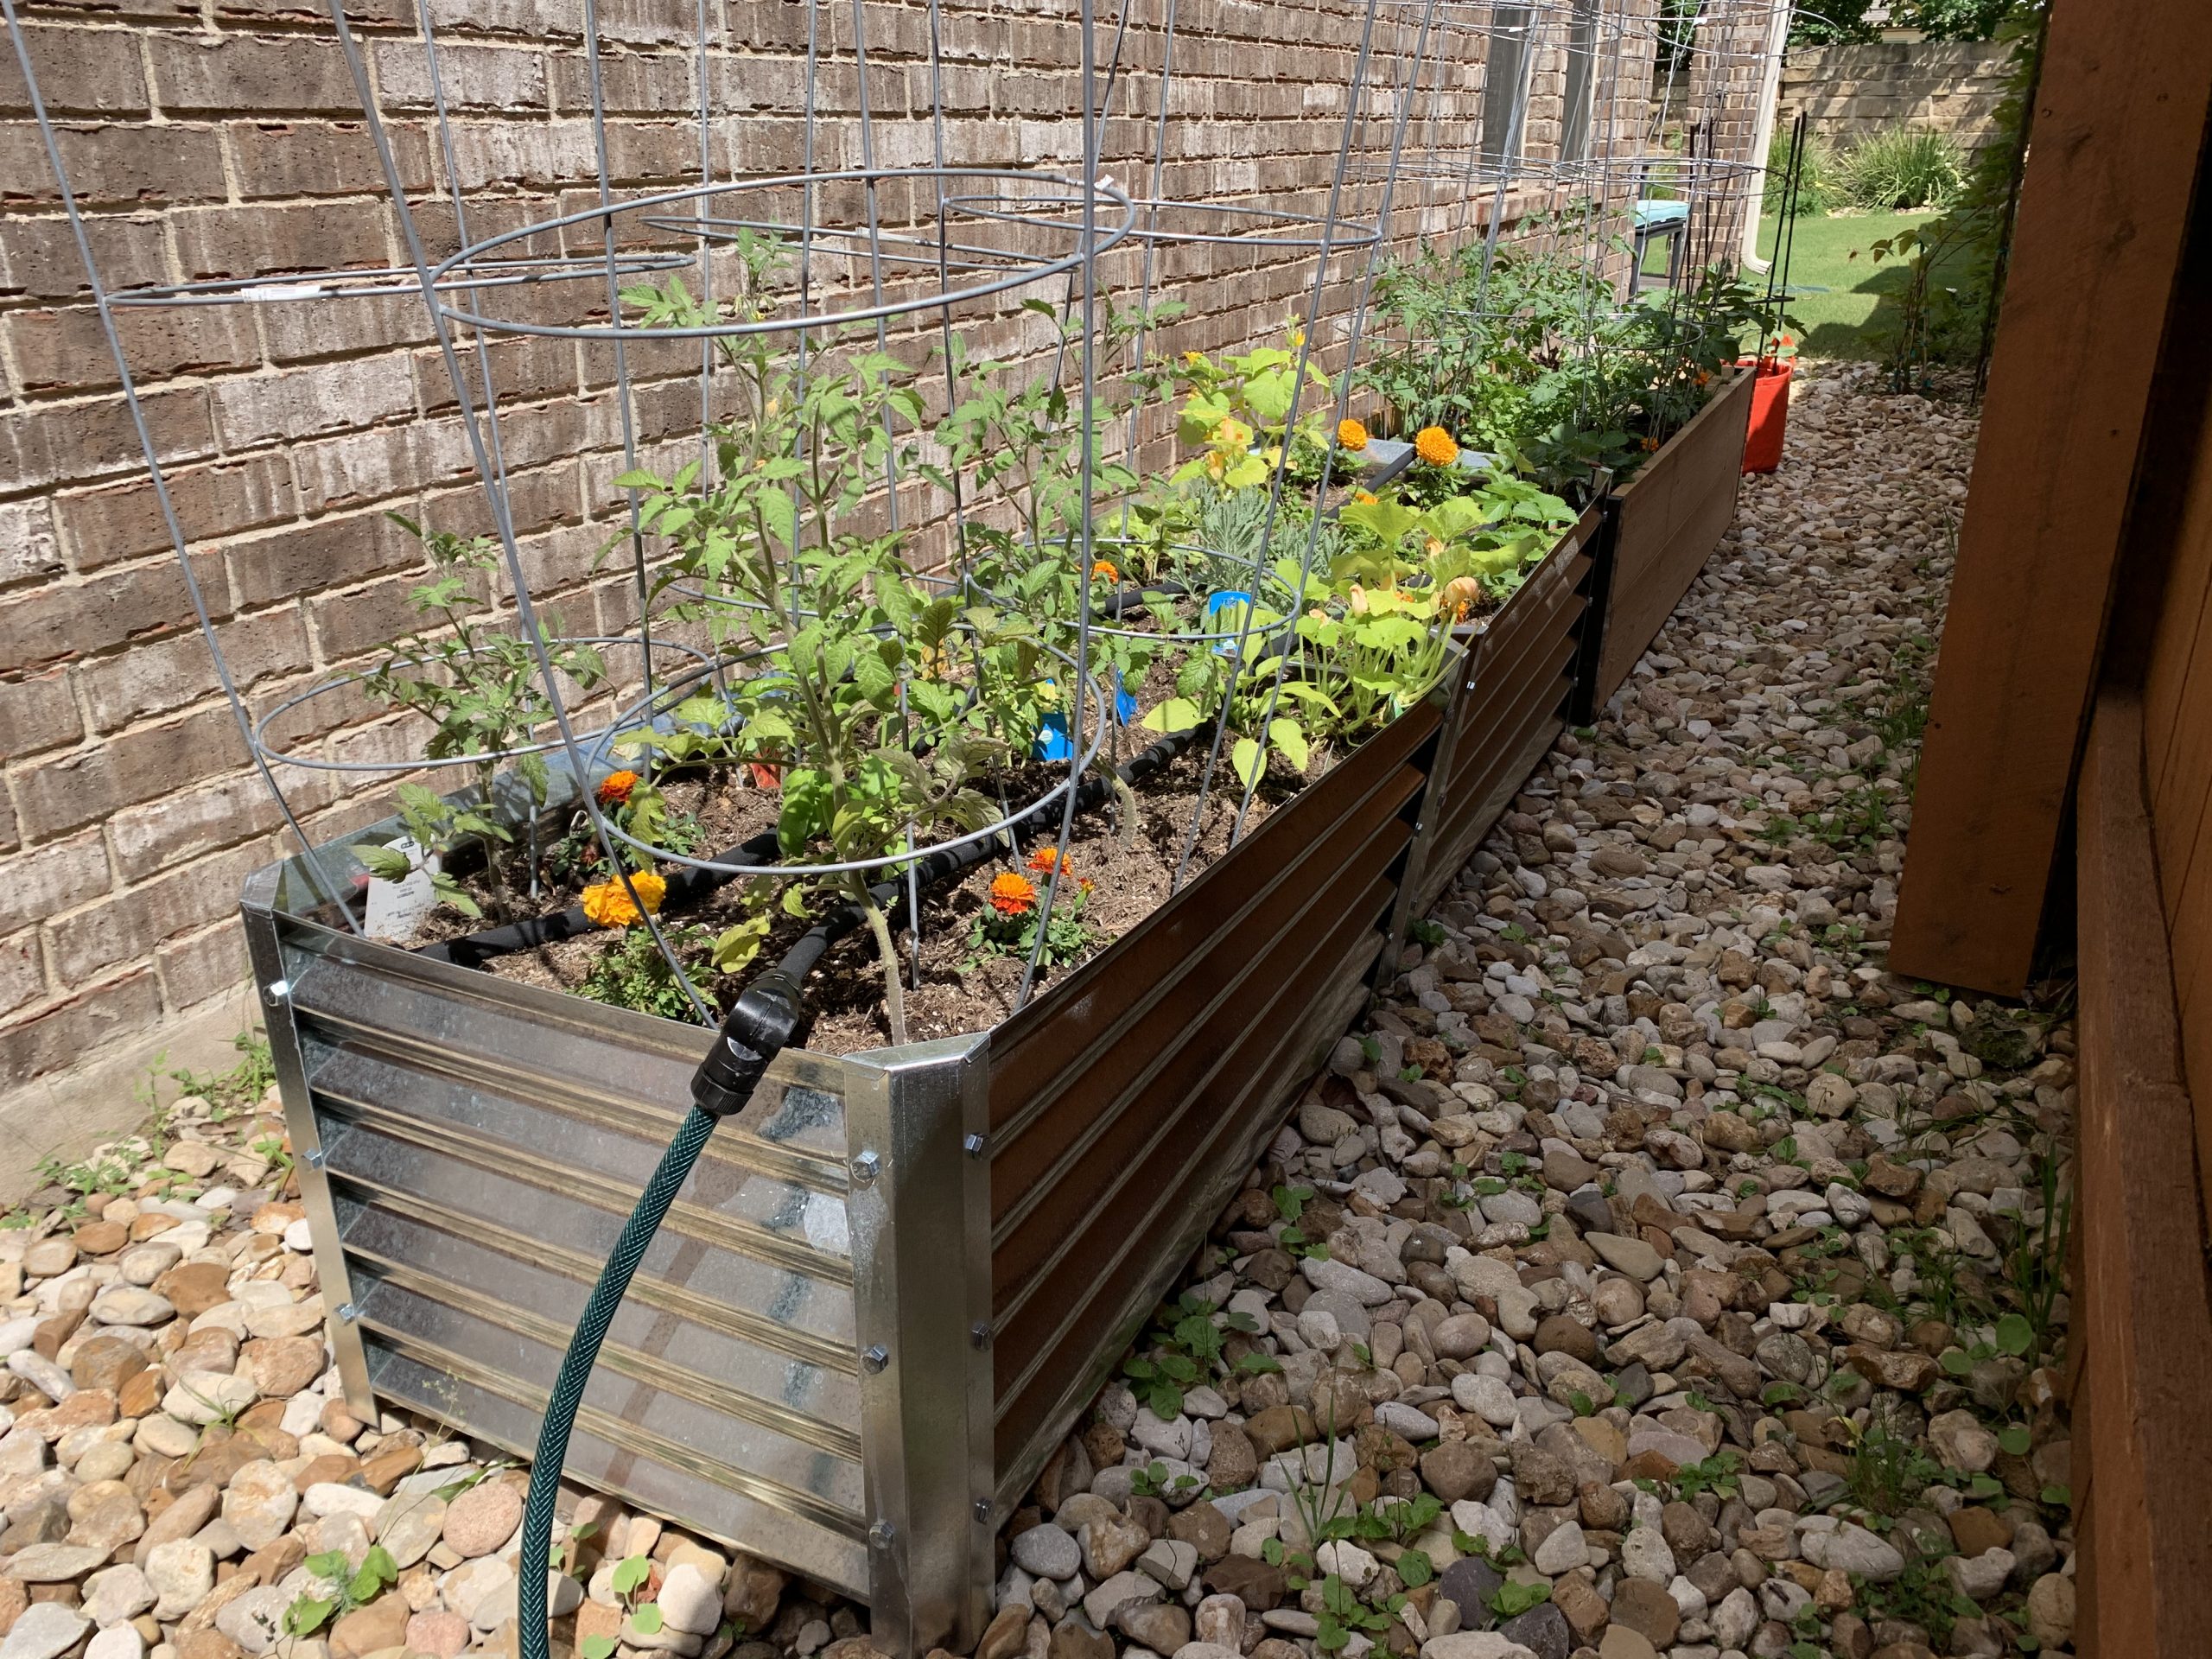
2. Pick a spot with sun & water. Choose an area that gets at least 6 hours of direct (ideally morning) sunlight. Watch your yard starting in the morning to note where the sun rises, and where shadows from nearby trees or structures occur throughout the day. My best option appears to be the side of my house atop river stones (offering good drainage) and close enough to a water spigot.

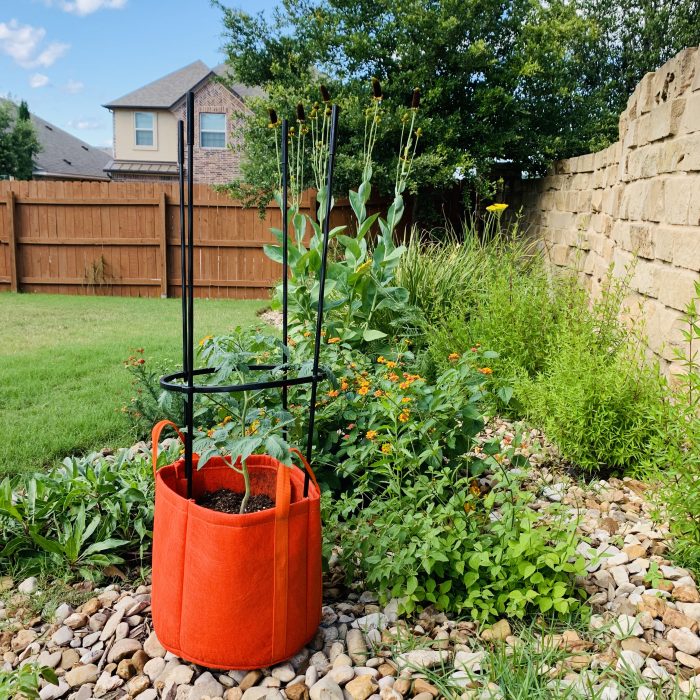
3. Raised beds are best. Planting a garden directly into the ground (as I’ve learned the hard way) comes with problems—more weeds, time, money and effort to get the soil tilled, amended, more garden pests, and oh my aching back! I love the modern look of metal raised beds and found a terrific place, Texas Metal Garden Beds, to get one of these. Cedar wood wards off pests, so I also got one of those. I opted for two beds, 2’ x 6’. Deeper (loose) soil offers additional benefits including higher plant yield (because roots have more room to stretch out) and in our scorching Texas heat, they’re apt to not dry out as quickly. Plus, in the fall when I’ll plant root crops, my carrots can grow long and leggy. Both containers were easy to assemble, and the cardboard box they arrived in was the perfect size to break down flat and place at the bottom of the beds; I then added a layer of newspaper, to help prevent weeds. I also got a Tomato Grow Bag Kit (with handles) so I can move it around my yard to see how more direct sunlight impacts my yield. Depending on these three container variables, I’ll expand my garden over time with what I learn.
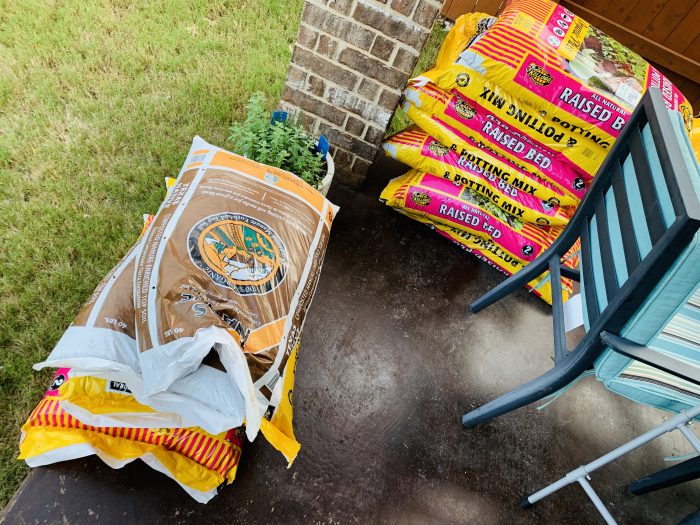
4. The dirt on soil and fertilizer. My total growing area is roughly 2’ W x 12’ L x 15” D, plus a little more for my tomato grow bag. Popping my numbers in a soil calculator, I bought 16 bags of Kellogg organic garden soil, two bags of composted cow manure and a bag of vegetable fertilizer (to boost root development and vigorous growth). I filled each of my raised beds about halfway full of soil, then added a bag of the manure, turned it well with a shovel, then filled it with the remaining soil. Afterwards, I raked in vegetable fertilizer (according to the amount listed on the back of the bag).
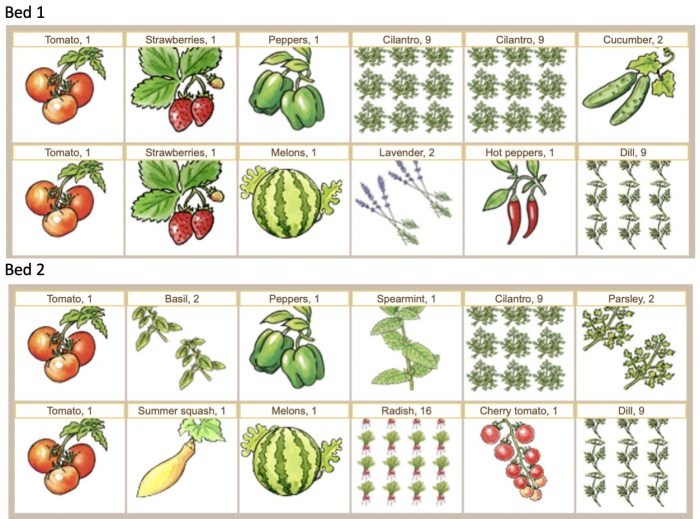
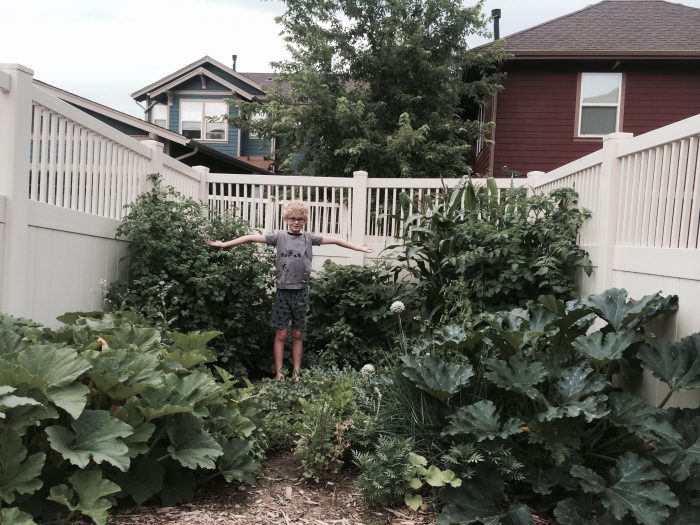
5. Plan your garden. I love this free garden planning tool. The pre-planned garden plans offer ideas on what grows well together, known as companion plants, and one of these might include just what you prefer to grow. The Design your own tab allowed me to fill in my garden bed dimensions to create my own. You can save (and print) to come back to later to edit based on plant or seed availability. My son wants strawberries, watermelon and cantaloupe. My mom, who lives with us, is all about tomatoes, and I found nine different varieties. I cook a lot of Mexican and Italian dishes, so I’ve got five varieties of peppers. Fun fact: A cup of chopped bell pepper has three times more vitamin C than an orange. Take that Covid-19! No summer garden is complete without zucchini (one plant is prolific enough). I added a bunch of herbs between my taller plants (cilantro prefers shade), several basil varieties, sweet mint (for my iced tea), culinary lavender, parsley, dill, and marigolds in corners as they help prevent pests. My plan includes a favorite of each of our three family members, so we’re all invested in this.
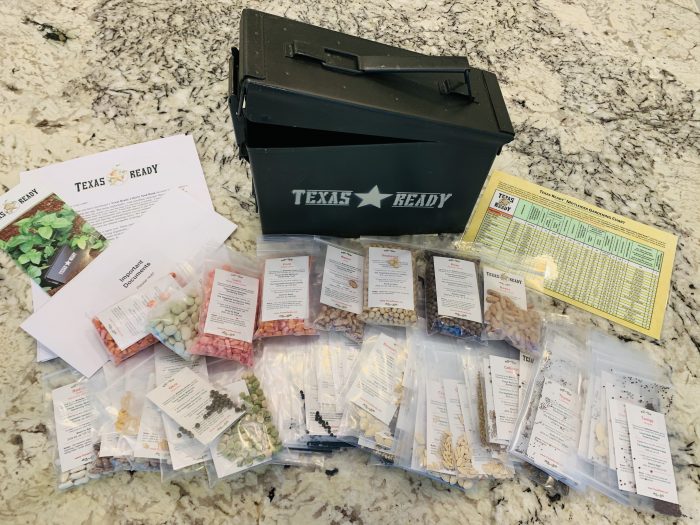
6. Seeds and Starter Plants. Starter plants are available at your grocery store and box stores (like Lowes and Home Depot). If your local plant nursery is allowing curbside pickup, check there first. I prefer to support local businesses and plant quality is usually better there. A wonderful resource for ordering top-quality seeds is Texas Ready, based in Spring, Texas. I got the “Piggy Bank” size which came in a metal ammo can loaded with over 70 varieties of heirloom, non-GMO/non-hybrid seeds. Texas Ready makes growing from seed a turn-key process, providing a laminated Texas Ready Mittleider Gardening Chart with each of their seed banks. For my garden, I planted both seeds and starter plants, but for my fall/winter crops and moving forward, I’m excited to use even more of my Texas Ready seeds.
7. Mulch. Adding a thin layer of seed-free straw atop your soil after planting will help keep plants moist and cool as our temperature increases, while suppressing weeds. Spiders enjoy hiding under mulch and will eat unwanted garden pests.
8. Water. Watering at the base of the plants, rather than from above, ensures moisture gets to the roots and prevents foliage fungus. This soaker kit was ideal for my plots, allowing me to place my gardens end-to-end and run the hose in a U-shape. This programmable timer is easy to set. My irrigation system isn’t set-it-and-forget it; I do find I need to use a watering can to supplement in a few areas, but it’s a great backup if I don’t roll out of bed first thing in the morning to water. Newly planted seeds need to stay moist until they break ground. Thereafter, and for starter plants, you’ll want to allow the soil to dry out a bit in between watering. Your leaves will tell you when it’s too much water (turning yellow) or wilt when they’re thirsty for more.
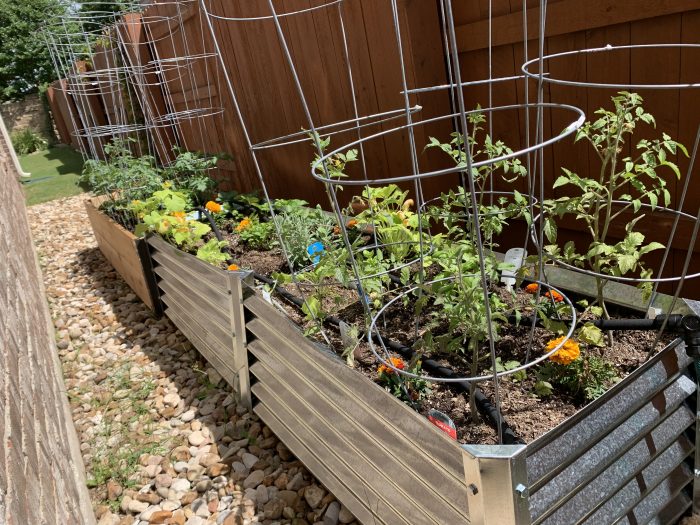
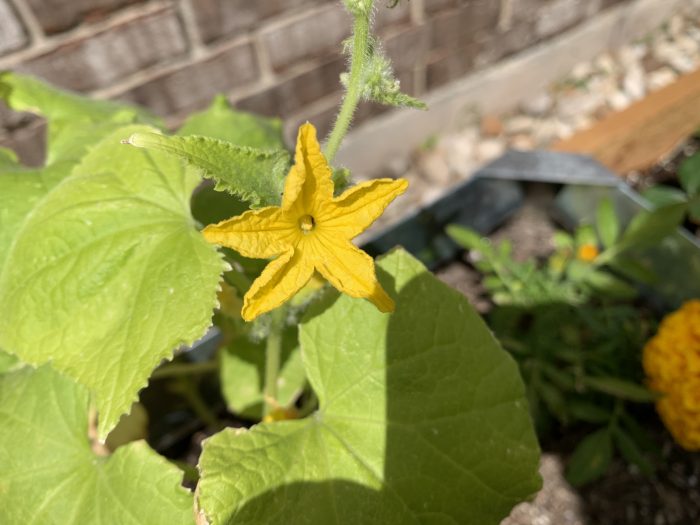
9. Support for tall plants. Tomato plants need support with something like a tomato cage. For my narrow garden beds, I opted for these inexpensive galvanized steel ones. If you’re growing beans, you can get by with a trellis of some sort like this or even lightweight trellis netting attached to a frame. Cucumbers, squash and melons may also benefit from a trellis to grow them up, off the ground, away from critters.
10. Weathering the climate. Keep an eye on the weather to modify your watering schedule and protect your crops. If severe storms bring hail, cover small starter plants with an empty box (turned upside down) or a plastic tub. Now that my tomato plants are large enough for cages, I can secure a tarp over them to prevent hail damage. If your plants begin to show sun scorch as Austin temperatures rise, you can always add a bit of shade with something like this.
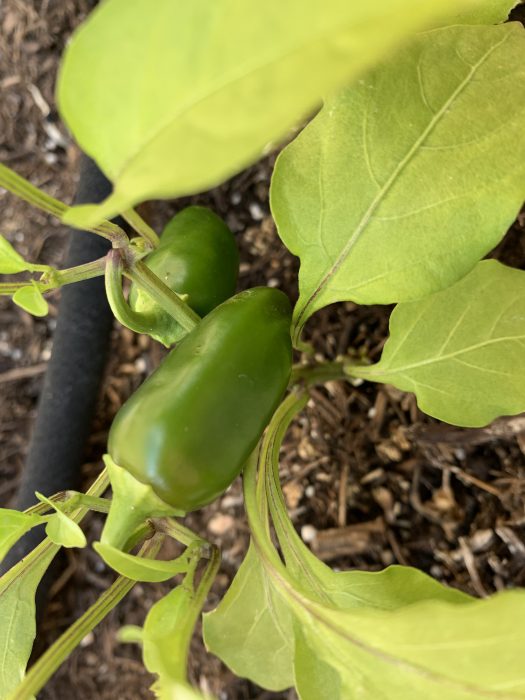
11. Tending your garden. Generally speaking, you’ll want to remove any yellowed, heat scorched, or diseased-looking leaves from your vegetable and herbs to keep plants healthy. To start your pepper plants off right, prune them like so to build sturdy, prolific plants. For tomatoes, this is a great pruning video resource and for basil, I like this one.
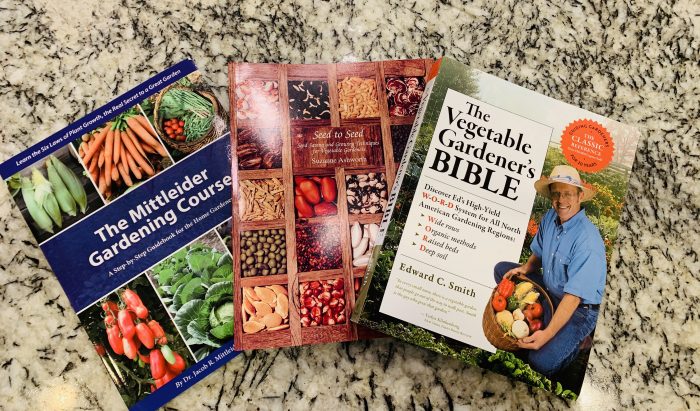
12. Continue to grow your knowledge with a few essential resources. The Vegetable Gardener’s Bible is the classic, revered by many, and will dive deeper into other areas like when to harvest your fruit and veggies, as well as identifying friend or foe garden insects. The Mittleider Gardening Course guides you on maximizing space, resources and time with easy-to-follow steps for your grow boxes or soil beds. Seed to Seed pays for itself with a wealth of knowledge on seed saving and growing techniques. All three books are affordably priced at Texas Ready, and depending on which seed bank you buy, may come with your purchase. Central Texas Vegetable Gardeners is a Facebook group of gardeners with members that range from newbies to seasoned pros.
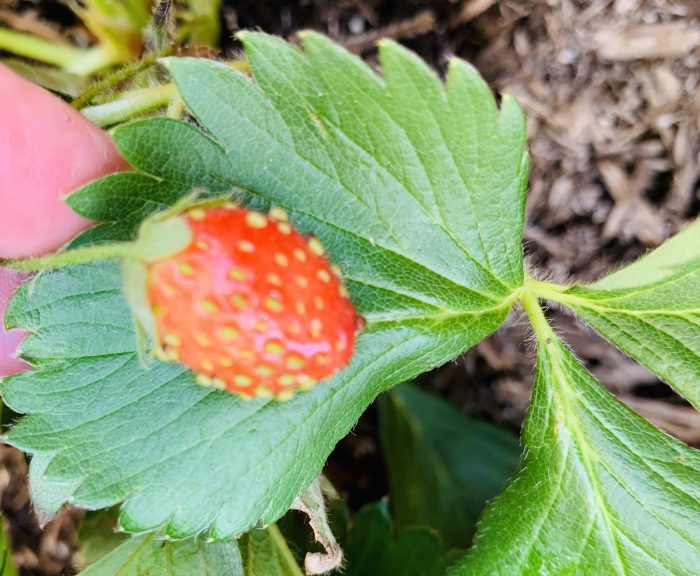
These dozen tips should plant some seeds of inspiration to start your very own COVID-19 victory garden. Eating more fruits and veggies will bolster your family’s immune system, which is especially important during a pandemic. Besides food, you’ll grow memories gardening with your kids. My son is already asking me when our cantaloupe, watermelon and strawberries will be ready to harvest. He still doesn’t know that mom’s amazing summer brownies are made with zucchini. Finding yummy ways to sneak in more veggies is always a victory.


