


 Some crazy guy decided to marry me a couple of years ago. Pinterest was just becoming known and Etsy was all the wedding planning rage. Since I was a stay at home mom and on a wedding “budget” I thought to myself, hey, I can make some of my decorations that I like on these sites and save a few bucks! And so I did.
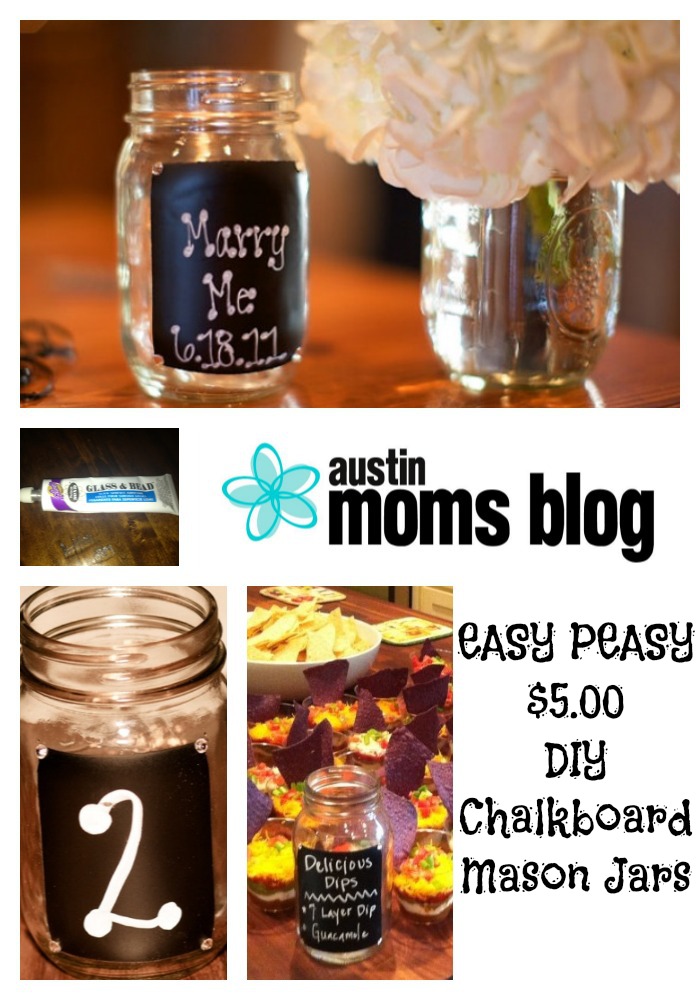
So you may be thinking, okay…. I’m not getting married… But wait! Since our wedding, I have proudly used these adorable self-made chalkboard mason jars for a Christmas party {I wrote the party food on each jar}, birthday party {creative party food was written on the chalkboard}, I gave one to a neighbor whose dog died {it was filled with homemade flowers and had a sweet RIP message}, and most recently, I used them for teacher appreciation week {filled the jars with Hershey Kisses and wrote a sweet note on the front from Lincoln}.


They can seriously be used for so many different things! And they’re cheap cheap cheap!!!
What you need, all found at Michael’s {prices are approximate}:
Any sized mason jar, $2 {quart size}: I have pints and quart sized. Just make sure you buy the kind that at least have 1 smooth side for your chalkboard
4 mm Flat Back Swarovski Crystals, $5 for 30 crystals: These are optional, but help complete the look of the chalkboard by placing one in each corner
Rust-Oleum Chalkboard Paint, $4: I used spray chalkboard paint
Painters Tape, $5: You will have a ton of this left over
Liquid Chalk Pens, $2: real chalk just doesn’t show up that great
Knife, FREE
Aleene’s Glass & Bead glue, $6: You will have a ton of this left over as well
Here’s how you make it!
Take your mason jar and painters tape. Using pieces of the tape, create a square or rectangle on the flat side of the jar. Make sure it’s big enough for you to write creative messages on.
Once you’re all taped up, go outside. Make sure there’s no major wind, or lay some newspaper down in the garage, and spray your little square. Be careful not to have too much overspray. The chalk paint comes our fast and hard so spray something of no importance first just so you get the hang of the spray. No matter what you will have some over-spray.
Lay your mason jar flat with your chalkboard paint facing the sky. You don’t want dribble marks. If you don’t do this gravity will take effect and you will have dribbly looking dry chalk boards.
Once the paint has dried (a few hours), gently peel the painters tape off. You will be left with a cute little chalkboard. You might have some over-spray. Grab your knife and gently scrape the overspray off. Be careful, because the paint scrapes off very easily so you don’t want to screw up your main chalkboard. Overall this process doesn’t take a tremendous amount of time, because again, the paint scrapes off easily. Which means you need to handle your completed mason jars with care so you don’t mess up your main chalkboard. If you do, you can always dab more chalk paint on it to fill in any scrapes.
Get your crystals out, dab a tiny amount of glue on the back and place in every corner… or wherever you want. Be creative!
I sold a batch of these on Etsy and actually MADE money! But I kept a ton for special events and parties we may have in the future. I love love love my crystal mason jars and they really are super easy to make! I have at least 30 in the pantry to use for gifts or special occasions!
Happy Chalkboard Mason Jar Making!!!


